Trusses
At this point, we had 22 sturdy posts sticking out of a concrete ring. The
posts were buried to slightly different depths, so we climbed up on a ladder
and determined that if we cut the tops off each post so that 15' 7 1/2" was
exposed above the top of the lower splash plank, then with a 1" gap at the
bottom, the 16' metal sheets for the sides would not have to be trimmed. We
measured the 15' 7 1/2" level and snapped a chalk line, duplicated the first
row of girts (still with the chainsaw) and nailed the girts into position.
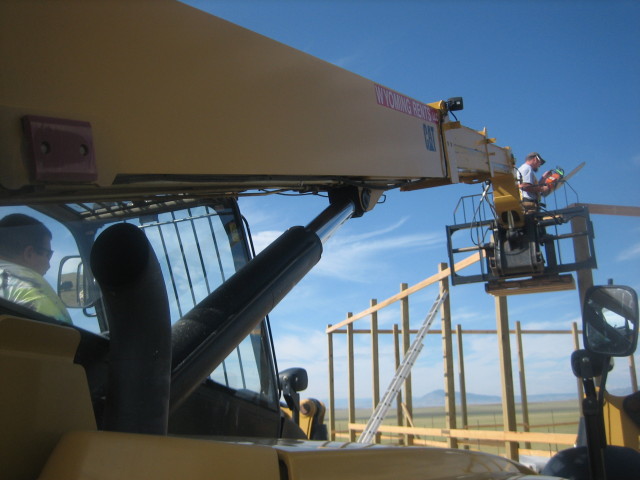
For this task, we made use of a TH-560B telehandler that we rented from
Cheyenne for the day. There were no TH-83s available in town or anywhere
nearby, so we ended up with a machine much bigger than we really needed. We
got underway around 8 AM.

Chris was our man in the sky. He worked through part of college as a roofer,
so he has learned to work while flying. I tried a bit, but from 22' up the
game is a bit more difficult. There was plenty of work to be done on the
ground, so I stuck to that while Chris flew.
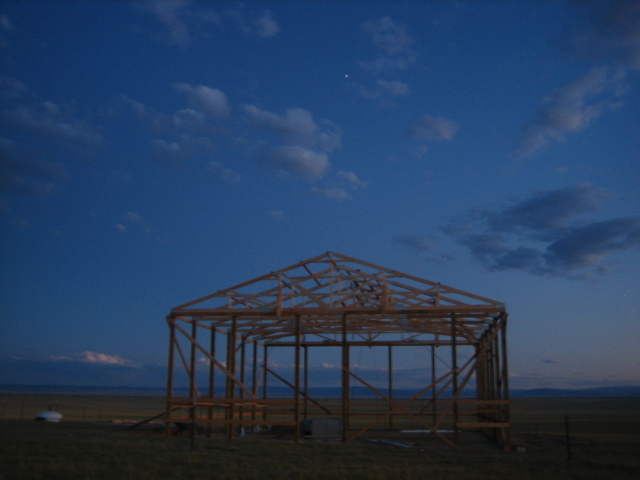
The trusses were manufactured by a company in Laramie. They are huge,
engineered, reinforced triangles that support the roof.
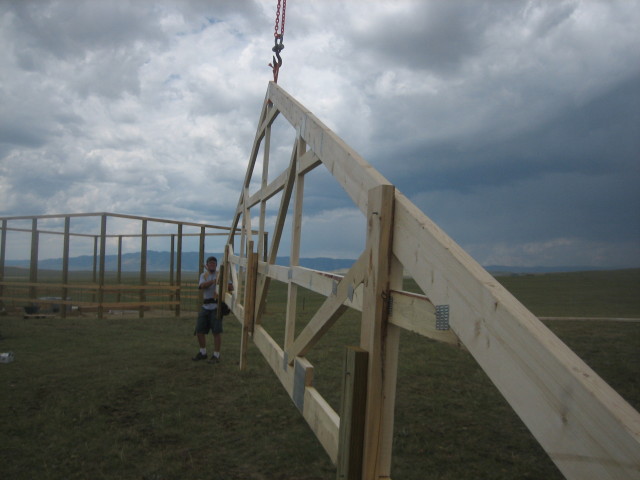
We fashioned a choker for the truss out of climbing webbing and attached
a chain and hook to the fork of the telehandler. The TH-560b made easy work
of lifting the trusses into place, but that was only the beginning of the
struggle.
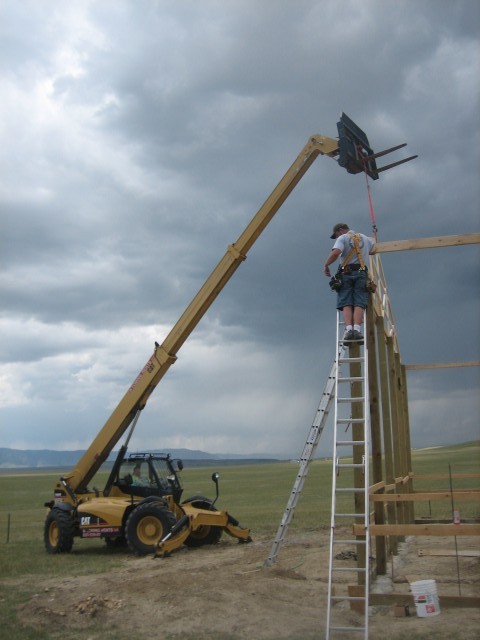
As we nailed the contact points of the first end truss to the tops of the
posts, the wind picked up. The sky got dark. Then it got darker. By the
time we had the first truss fully braced off, the wind was howling and we
were all cursing Mother Nature. We didn't dare unhook our improvised crane
because we thought the wind would tear the barely-attached truss off the
top of the building. Trussing is normally not done in high winds, but
since we only had the telehandler for the day and renting it for the
following day would be extremely expensive or impossible, we decided we had
no choice but to press ahead. The crane was detached and the truss moved
around a lot in the wind but did not fall. We raced to add another.
The first truss, being an end truss, was connected to 6 poles. After we had
the second truss in place, we realized that its two post connections plus
a few braces conencting to the first truss were barely sufficient to hold the
second truss in place against the (increasingly blustery) wind. If we were
nervous to take the crane of fthe first truss, we were terrified to remove it
from the second. But there was no other way to continue, so Chris directed
us as we added cross braces in the corner, and then we unhooked hte crane and
sprinted to put number three into place.
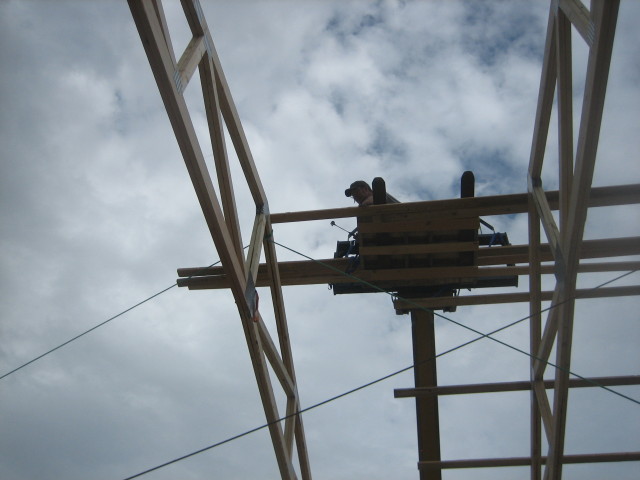
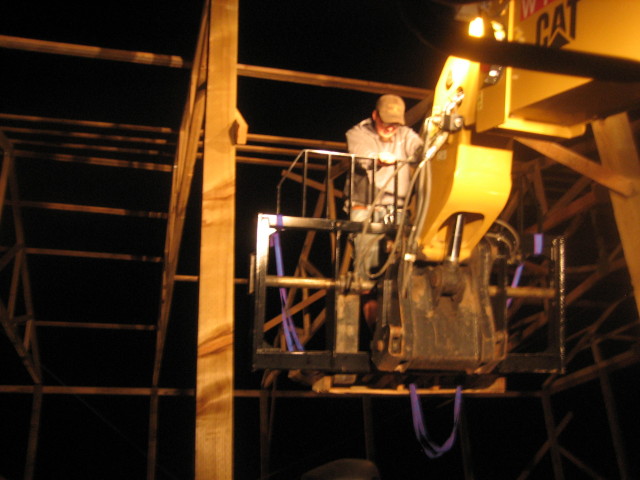
It's pointless to try and convey what a collossal bear this trussing job was.
I will leave you with a picture taken approximately 17 hours into the workday,
as Chris is riding the lift down after nailing the last brace in place. If
you ever have to set trusses, for God's sake don't do it on a windy day. And
if you have the means to pick up a TH-560b, definitely do, it's quite a toy.
watch us move a truss
After all of that, the building is finally starting to look like a building.
Girds
We rented some busted-ass scaffolding from A-1 Rentals. If you rent from A-1,
you will pay good money for shitty, tired, broken equipment that is missing
pieces. It's a real shame that companies like A-1 exist, but in small towns
it can be tough for a new place to start up when there is already an
established, albeit terrible place. If I die on this scaffolding, whoever is
reading this should please sue A-1 on my behalf. That is all.
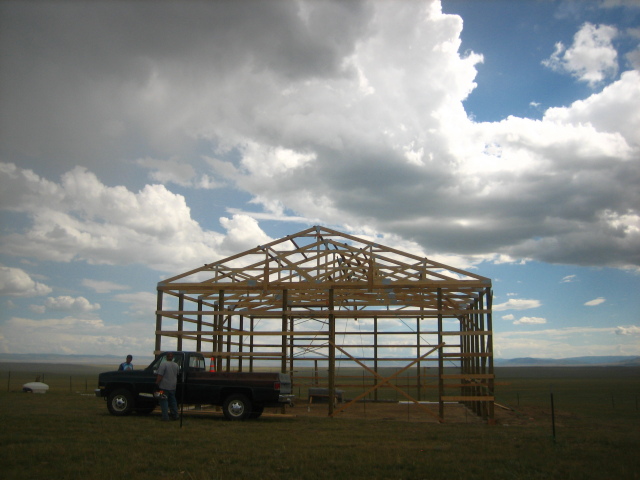
We used said scaffolding in combination with some ladders to measure and
attach 3+ sides worth of girds before we ran out of 2x6s. It's starting to
look like a real building.
I took a short break for some work-related stuff in Boston and when I came
back, I brought Dave. He and I finished up the girds on the west wall in
an afternoon.
next